Monday, September 28, 2015

How to Have a Yoga Body Part 5

This is Padangustasana, toe stand. I love it because it is all about having balance through focus

Drishti is a Sanskrit word that comes from yoga. The practice of Drishti is a gazing technique that develops concentration and teaches you to see the world as it really is. In yoga, drishti is a point of focus where the gaze rests during a posture and meditation practice--gazing outward while bringing awareness inward.

How to have a yoga body? Practice, practice, practice.

Sunday, September 27, 2015

Customizing My Dressform

Me today with bigger (July) me
Did I mention I have recently lost 30 pounds? Makes me glad I never made my padded dressform permanent. I had been feeling like I was wearing a quilt on my body. I opted for an easy way to make my dressform conform to my measurements when I was big. I added batting to it and popped over a tank top to keep it in place.  Getting ready for the sewing bee challenge number 3, a lined jacket, I needed to update my dressform to match my updated body.
I am holding all of the batting that came off. Yay!
With fresh measurements and updated dressform, I am ready for the next challenge.

Sunday, September 20, 2015

Pattern Review Sewing Bee Entry Number 2

I am proud of my self restraint not going crazy all over the fabric like I did with my colorful jacket in the Spring. I hope it is enough to make it through to the next round. You can get an idea of my process in the next couple of photos. I love my new dress. Check out the other entries. The deadline is mid-week I think, so there could be up to 50 entries by then.  There are already some show stopping pieces posted.

Wednesday, September 16, 2015

Pattern Review Sewing Bee Challenge number 2


Last year I didn't get this far because I am not always good at following directions - maybe that is why I write them? Round 1 was making a fitted blouse, you can see my pattern review here. 
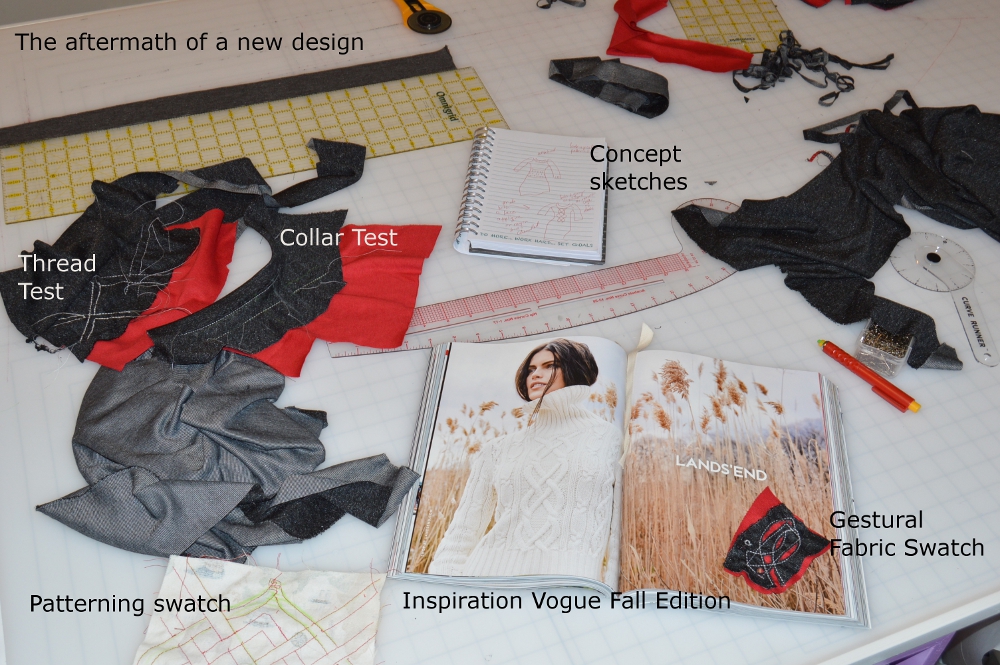
 For round 2, we were asked to embellish some fabric and make a garment out of the new textile we create. These are the techniques I have ruled out.
 #1 hand embroidery - I can't even show you a photo of how bad I am at this, but I did poke around at it on Sunday night. 10 days is not enough for me to get good at this, so not going there.  Sorry Natalie Chanin, I love your work and the class of yours I took, but I will have to continue to admire your craft from afar for now.

#2 texturizing:  I have a polka dot fabric that will eventually be used as a muslin. The dots were much bigger than I realized when I chose the fabric online. I could not wear this fabric as it is, so I thought to shrink down the dots by hand stitching around them and gathering. It is a really cool effect, but it would shrink my 2 yards down to 1/2 a yard. It could be a really fun scarf, but I can't enter an accessory in the challenge. It has to be a garment.


#3 ticker tape quilting
I love it, especially the bright sample on the left. Lord knows I have fabric scraps for it. If it were Spring, I would make a skirt out of this for my entry.  So I looked at it in more seasonal colors, but this one one the right is not really photogenic.
I need something graphic for this online competition.


If you are not already following the Pattern Review Sewing Bee, I invite you to check it out and see the wonderful items being made. Pattern review is a great place to learn more about sewing and about specific patterns too.
I think I have decided on my project. I will show it off when I am finished.

Friday, September 11, 2015

A tour of my private island


Here I am enjoying my very own island. Getting ready to cut into some 54" wide fabric with room to spare. Loving my new studio and the organization that Cindy at reclaimed spaces helped me achieve. Here are the details for those of you who might want to duplicate this set-up. The cutting mat is 4 feet by 6 feet, I bought it online here. It is about 3/8 of an inch thick and just transparent enough to see the grid I had printed at Office Depot underneath. It sits atop a sheet of particle board - I may have to replace it with plywood at some point. The edges of the board are finished with white molding that is positioned to be 3/8 of an inch above the surface of the wood to create the hole that the cutting mat sets in.  The end of the island on the right is a dresser I found on Craigslist. It was already purple. It matches my slip covered wingback, so I decided to go with it. The other end of the island is held up by 2 bookcases which I had painted to match the dresser. The dresser now houses all of my works in progress. No more piling up projects! Everything is on casters to get it all up to 36" high.
View of the island from the sewing station. This bookcase holds all of my thread, piping, and bias tape. I spin around and everything is at my fingertips. The black and white fabric basket holds pattern making materials.
View of the island from the other side. This bookcase organizes the zippers that I sell to go with my bags.

Saturday, September 5, 2015

Tee Shirt Hack

If you are like me, you have a few things in your closet that you don't like enough to wear and you don't hate enough to give away.  I have a few tee shirts that I love the color or the print or something about them, but they are too short. I think you will agree that the sagging levi's and the cropping up top are not a good look.
I simply paired the Dr Who tee with a shapeless navy tee I picked up at WalMart for $4.97. Why would I ever purchase something so awful? Was I having an identity crisis?
The blue tee fabric I cut off the bottom became the perfect trim for the pink one. Adding a little length to the sleeve wasn't necessary but I think it balances out the stripe at the bottom. It would be nice to add a little touch of blue at the neckline too, but I am not going to go crazy for one tee shirt. Honestly, I have a dresser drawer full of paired up tee shirts to do this. Next time I will post more how-to details in case you need that visual. The hem of the finished shirt is the original hem from the blue which is sewn underneath at the original pink hemline, secured by top-stitching over the original pink stitches. The arm trim is some 3" strips of the navy shirt fabric sewn into the right size loop to match the sleeve, then folded in half. The hem is the fold and the raw edges are stitched to the original pink hem on the inside of the shirt. If you like upcycling and want to see more ideas, check out this blog put together by Goodwill.