Craftsy's BIG Summer Sale: Save Up to 50% on ALL Online Classes!
Want to learn a new skill or brush up on an old one? Now is your chance! You can save up to 50% off on ALL online classes at Craftsy's BIG Summer Sale! Cooking, cake decorating, sewing, gardening and so much more... all up to 50% off, with some classes starting at just $9.99! This is a sale not to be missed, so make sure you hurry because it ends at 11:59pm MT on Monday, June 9th.
**This post contains affiliate links and I will be compensated if you make a purchase after clicking on my links
|
Thursday, June 5, 2014
Big class sale at Craftsy
You know I love Craftsy classes. This is your chance to give them a try at incredibly low prices.


Thursday, May 15, 2014
Before and After Computer Nook Makeover

The keyboard tray is from Office Depot. You need about a 33" opening to install it according to the instructions. My opening is 30" Just contact me if you have a similar situation and I can tell you how we made it work. I love it!
The shelves are from Lowes. You need to cut "x's" in the fabric for installing anchors for the shelf brackets. Move the fabric away from the anchor area to keep your drill from catching on a thread and eating the fabric. (I have no experience with that whatsoever - just guessing that might happen...)
The crate that elevates the printer to give me another storage nook is from Michaels. I will paint it to match the shelves (in my dreams.)
The chair slipcover is from my easy pattern you can find on Craftsy.

Don't miss out on Craftsy's Mystery Markdown Flash Sale!
**This post contains affiliate links and I will be compensated if you make a purchase after clicking on my links
Don't miss out on Craftsy's Mystery Markdown Flash Sale! Enjoy big savings on nearly 200 yarns/fabrics and project kits now. Limited supply, shop before it disappears! Hurry, offer expires Friday, May 17 at midnight PST 2014. |
Sunday, May 4, 2014
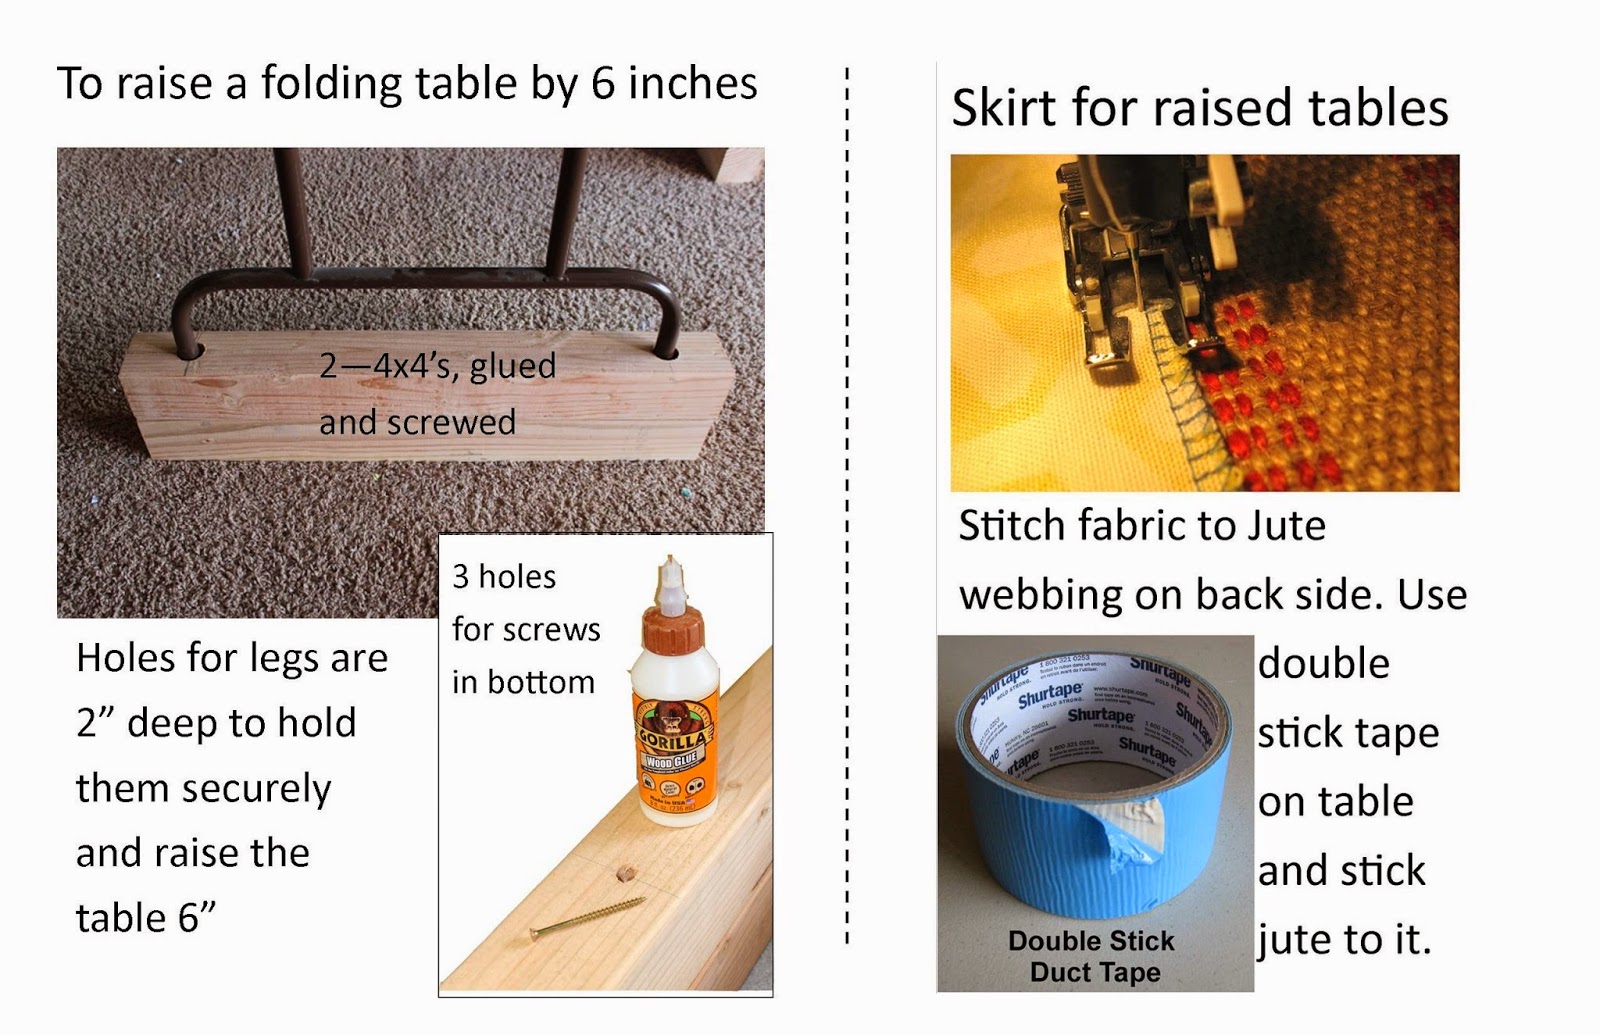
How to Raise Up Tables to Counter Top Height

Raising the folding tables was easier than I thought. Of course, it helps to have a friend with a wood shop. Once they were on their new risers (4x4's glued and screwed together so they were 8 inches tall and holes for the table legs 2 inches deep to hold securely) I could not wait to get skirts on them. The skirts are 34 inch lengths of extra wide fabric - luckily I had enough - you may need about 10 yards of fabric if you are doing 2 tables like I did. On the backside of what you can see, I have stitched the fabric to Jute webbing. I found double stick duct tape at Lowes and stuck that to the tables, then the jute sticks to the tape. I love it! I hope this little how-to helps you upgrade your creative space.
Thursday, April 24, 2014
Sell your own patterns
I have personally encouraged many of you to sell your own ideas as patterns. Craftsy makes it easy. It is worth the time it takes you to figure out how to teach your process because once it's done, you can move on to the next thing. If you knit, crochet, sew, quilt, paper craft, embroider, or make jewelry, you can be a Craftsy designer! You should be making money from your awesome designs and not worrying about someone else copying you. That is what I think.
How to Add & Sell a Pattern on Craftsy
(This post contains affiliate links which means I will be compensated if you purchase after clicking these links.)
(This post contains affiliate links which means I will be compensated if you purchase after clicking these links.)

In addition to wonderful online courses and craft supplies, Craftsy also has an independent online pattern store that lets anyone upload and sell downloadable e-patterns with no fee!
How do you add a pattern to Craftsy and start your pattern store? It’s easy!
1. Make sure you have a Paypal account. All pattern transactions happen through Paypal, and Craftsy requires that you have a Student, Premier, or Business account in order to sell patterns.
2. Put your pattern in .pdf format. You can’t upload any patterns to the online pattern store unless they’re a .pdf file format, so if they’re currently saved as a Word doc, .jpg, or other file format, you must convert it to a .pdf before you upload it to Craftsy.
3. Include a photo. All patterns must have at least one photo to accompany them, but you can add up to five photos. Colorful, interesting photos tend to work the best for catching our members’ eyes!
4. Fill out the pattern description. We will ask you some basic questions around your pattern making it easier for Craftsy folk to find your pattern and know what your pattern is for. Make sure you have info about your pattern handy for this step.
For more information on how to sell a pattern through Craftsy, or to get started, visitCraftsy today!
How do you add a pattern to Craftsy and start your pattern store? It’s easy!
1. Make sure you have a Paypal account. All pattern transactions happen through Paypal, and Craftsy requires that you have a Student, Premier, or Business account in order to sell patterns.
2. Put your pattern in .pdf format. You can’t upload any patterns to the online pattern store unless they’re a .pdf file format, so if they’re currently saved as a Word doc, .jpg, or other file format, you must convert it to a .pdf before you upload it to Craftsy.
3. Include a photo. All patterns must have at least one photo to accompany them, but you can add up to five photos. Colorful, interesting photos tend to work the best for catching our members’ eyes!
4. Fill out the pattern description. We will ask you some basic questions around your pattern making it easier for Craftsy folk to find your pattern and know what your pattern is for. Make sure you have info about your pattern handy for this step.
For more information on how to sell a pattern through Craftsy, or to get started, visitCraftsy today!

Tuesday, February 25, 2014
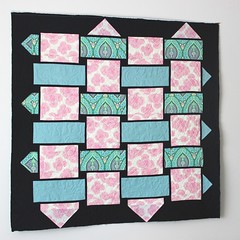
Warp and Weft Quilt
I am excited about getting this out in pattern form. I pinned it to my bedroom wall to take a photo. It motivates me to bind it, so I can hang it properly. The solid is an Amy Butler linen I have had forever. The other 2 are also from Amy Bulter. I love how it brightens the wall behind my king size bed. This quilt is 51" square. I have Alice piecing another one for me in a bed size out of Parson Grey fabrics for my son. He is going to love it.
This was the first project I used to try out my new EQ quilting software. The one drawback is the software does not allow for strip piecing which is how I do this quickly, so I need to write the instructions by hand. Using EQ, I was able to audition fabrics for the quilt without cutting into it, which was great. The program also gives you yardage which is awesome. So far, I am glad I got the program.
Lots more happening right now, but I wanted to pause and share this with you.
This was the first project I used to try out my new EQ quilting software. The one drawback is the software does not allow for strip piecing which is how I do this quickly, so I need to write the instructions by hand. Using EQ, I was able to audition fabrics for the quilt without cutting into it, which was great. The program also gives you yardage which is awesome. So far, I am glad I got the program.
Lots more happening right now, but I wanted to pause and share this with you.
Tuesday, February 4, 2014
Using Quilting Cottons on the Departure Satchel
 You know I prefer home decor weight or outdoor fabrics for the departure satchel, but I did recently make one with quilting cotton. I want to help you use your incredible stashes of quilting cotton, so I have made some notes for you here.
1. Plan on having a dry clean only bag. That way, you can use the duck without prewashing it. The finish on the duck is really nice if you don't wash it and I think it gives the bag better shape.
2. The lining of the bag can be made following the original instructions. The only changes are to how to handle the exterior fabric. (and the duck if you use it without washing)

(If you insist on your bag being washable, I do not recommend the iron on interfacing. You will have to find a sew-in interfacing to substitute. You are looking for thin but stiff interfacing. That is what I love about the decor bond.)
4. Add piping at the end of step 3 and at the end of step 6, going all the way around the front and back of the bag. Also, piping at the top of the trolley sleeve is nice.
(I added lining in the front pocket which is really nice, but it would not be necessary if I had used piping on the pocket instead. Next time, piping on the kangaroo pocket. Also, my fabric got too thick at the top front for the piping, which it would not have been had I not lined that pocket and used the piping instead.)This is how I love to travel, with both the duffle and the departure satchel. They look great together too.

Subscribe to:
Posts (Atom)