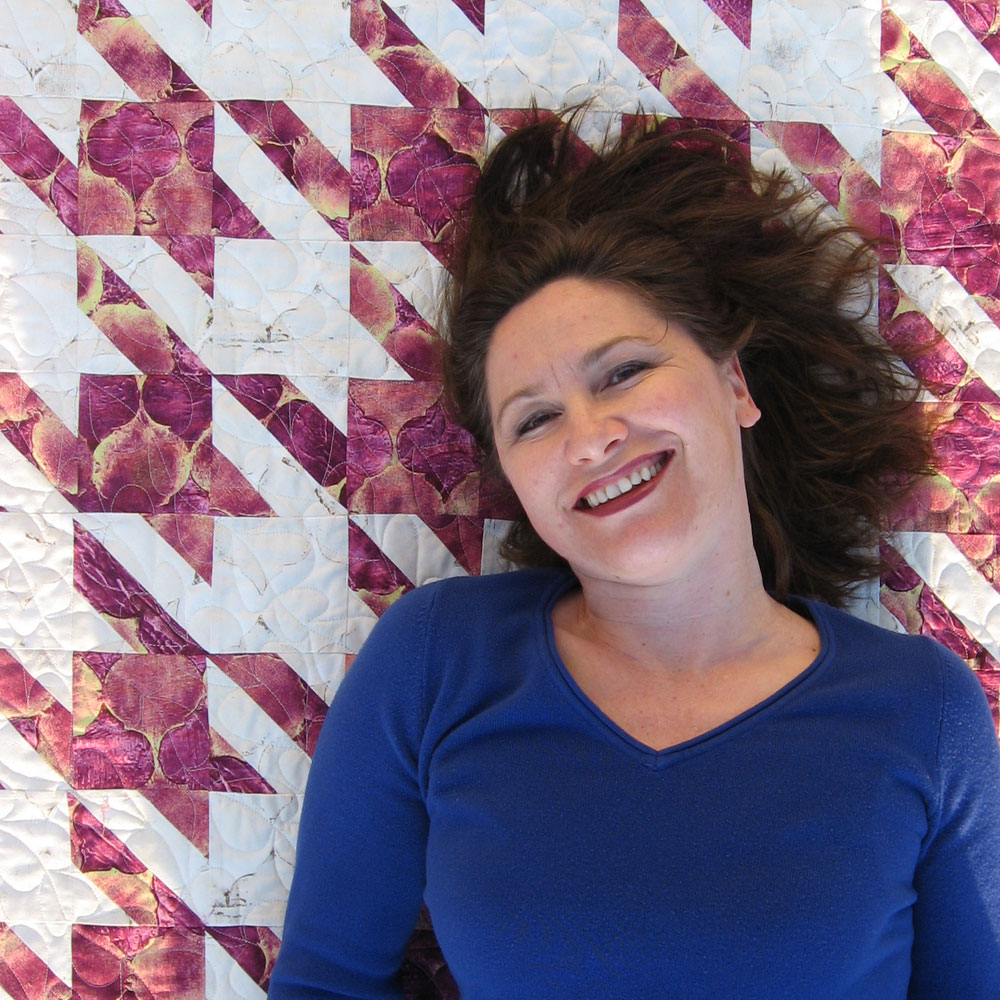
Tuesday, February 19, 2019

Slip Covered Chairs and other Furniture

Sometimes achieving the effortless look requires extra effort and expertise. Such is the case with this one piece draped slip cover I recently finished for my good friend CAM. This is probably the next thing I should video tape and offer to teach. 
In my new home with David (We grew up in the same church, and went to school together,sharing many of the same classes from the 8th grade through high school.) we are really enjoying this warmth of these "twin" slipcovered wingbacks.
Before I left Spokane, my life was a whirlwind of slipcovering for my Eastern Washington friends. Here are those projects:


Now that I am in Puyallup, I am available to make furniture covers on this side of the mountains. Facebook might be the easiest way to contact me. Do a friend request first, so I see your message.

Monday, July 10, 2017

More Marcy Tilton Fabric Shirts and Quilt Top to Donate

There may not be any of this left by the time you click the link, but Marcy has lots of great linen choices. My customer loves her new blouse and ordered another one right away. Since this fabric is a little gauzy compared to the linen I usually use, my customer requested a smaller collar, so I drew that up. Looking at this photo, I feel like it should have pockets too, maybe soon.
I am packing up to move, and I came across this quilt top I pieced years ago. Probably 2006 or 2007. It's all flannel. I am looking for someone who has the materials, time and inclination to quilt and donate it. Let me know if you are in the US and you want it. I will mail it to you.

Friday, May 26, 2017

Pratesi Linen from Marcy Tilton Fabrics

I modeled this shirt briefly before mailing it off to my Brandybuck Clothiers customer. I love this new Italian linen from Marcy Tilton. This is the flax color. I failed miserably trying to make perfect pleats in the front, so I sent the fabric to Alice to recut and sew. She made it perfect and I bowed down to her when I picked it up. One of the things I love about this fabric is the 106" width. Keep that in mind when you see the price. It really is a reasonable price.

I found this dried maple tree flower on my patio table this morning and photographed it on the white linen. I think you will love these fabrics like I do. We may play with dying the white for some Summer fun.

If you want a perfectly pleated shirt (we also do them in dress length) I sell them at Brandybuck Clothiers. The womens have bust darts, but otherwise, they have mens shirt styling with big arm holes and a bit of a drop shoulder. The collars are big too.

Friday, March 24, 2017

My Jacket Express and Pattern Review

I know you want this class now if you missed it last week. The Craftsy class includes the physical pattern mailed to you which makes it a great value. Here is an affiliate link that gets you a 25% discount.
 Being able to sew along with the video classes was wonderful. I could put my brain on cruise control and just follow Janet. I love her teaching style. She is a very sweet and helpful person. I think the pattern is very clever. As you can see, I LOVE that it has 19 pattern pieces - all the better to mix fabrics, my dear.

I used the finished garment measurements to choose a size, and I made the size small. It was supposed to be 43.125" at the bust (and hip) but mine came out about 42" when closed. My snaps are set in .75" from the front edges. The button hole markings are probably a little closer than that which would account for the difference.
I loved learning how to use the pressing tools properly.  I recently purchased the point presser from Janet's website and I used the bottom of it as a clapper. I already had a point turner and a sleeve roll. Janet uses a seam stick instead of a sleeve roll. I am going to have to get that too, it works better than a sleeve roll for pressing seams.  Here is a link to Janet's pressing tools for sale.
Changes I made to the pattern:
1. I needed the breast pockets on the outside for my design - the original pattern has them on the inside and a very clever opening and top stitching. To accomplish my contrasting pockets, I used the pocket pieces as facing pieces but instead of stitching them to the outside and turning in, I stitched to the inside and turned out.  I kept the shape of the pocket opening by making the top edge of the pocket match what the facing would have been, and added muslin pockets behind the facing (fake) pockets.
2. I lengthened the sleeves by an inch and a half. It is a 3 part sleeve so that was a little tricky to get the shape just right after lengthening and I don't think I did a great job of it. I want to revisit the sleeve next time and redraft a sleeve using Suzie Furrer's class.
3. When installing the cuffs, I completely sandwiched the sleeve edges and mostly burrito'ed the sides and ends of cuff, leaving about 3" open to turn. I liked the way this came out better than the way she shows in the class. (I did one her way and one my way)
4. I made the collar pointed instead of curved.
5. I took 2" out of the length of the center back, tapering it out to meet the side seam. The jacket was hitting me right on the bum and it was keeping the jacket from hanging properly. (All that hiking and stair climbing is paying off!)  The hem still looks straight when I am wearing it. This change means you have to change the shape of the back facing piece to match.
6. I used snaps instead of buttons and button holes.  My spacing is different too. I used 5 snaps on the front instead of 4.
Additional changes I will make next time:
1. I will cut the front facing slightly longer than the pattern at the top end where the facing meets the shoulder seam. Having only 1/4" seam allowance is not enough for me, I ended up short on one side. I can always cut it off later if I don't need it.
2. I really do not like the notches at the shoulder and the final closure of the collar. I would like to try leaving the upper collar and under collar unconstructed until the end. Maybe the upper collar could attach to the facing and the under collar attach to the jacket, then they all come together along the outside edges. That might work better for me without the 1/4" deep notches. The other option would be to simply stop and start sewing again at the notches rather than making them long enough to flip out of the way.
3. Sleeve vent I will make and/or finish differently. Maybe take a look at doing a different sleeve. I need to make a whole sleeve at the correct length and then break it into 3 pieces. Adjusting the length of 3 sleeve pieces just did not work. Wearing it's great, but I know it could have been drafted better. The original is great but just not long enough for me.
I hope you'll take advantage of this class and pattern. I think you will love it like I do. Connect with me and show me your jackets. I would love to see them.  I posted some of my process photos on Instagram. I am @StudioCherie_sewing on Instagram. If you follow me there, you will see the TripsterShirts as I make them. I'll be making more of these jackets with the TripsterShirts label. One of my friends commented that it had a '70's vibe. Next photo shoot, I will stick my front leg way out for the "keep on truckin" pose.

Thursday, March 16, 2017

Clock Towers Quilted Clock

I was inspired by Kim Lapaceck's Dresden Neighborhood pattern and the theme "Time" for challenge 6 of Project Quilting Season 8.  Things I would do differently next time:
Plan First. This was improvised and things got added on in different orders than I would do again.  The order of sewing for next time:
1. Buy the canvas first so I know what size the finished clock will be including wrapping the quilt to the back of the frame.
2. Sew the 12 pieces together and quilt them to the background fabric (carefully centered on the background fabric) like I did (with some felt behind it as shown.) Do all of the quilting on the towers before adding any embellishments.
3. Add the center circle, but don't quilt inside it yet.
4. Applique clock faces and belfries (Play with placement on the belfries. I wonder if they should be closer to the clock faces and maybe some above them?)  Be more careful with the clock placement especially positions 12, 3, 6 and 9, so that actual clock hands will line up with the centers of the clock faces.
5. Add a layer of felt to the back (Cut off the corners so that there is only fabric and no felt to wrap on the back side in the corners) and quilt the center circle, add the roofs, and quilt the background.
(Before quilting the center circle, mark the hole placement for the clockworks so I don't have to cut any stitches when I make the hole.)
6. Finish the edges of the quilt.
7. Cut hole in the center of the canvas.
8. Cut hole in the center of a 4" x 4" piece of peltex ultra firm stabilizer, center it on the canvas hole on the back side and stitch it in place. This just adds a little firm depth for the clockworks to hold onto.
9. Double check positioning of the quilt and staple it to the frame.
10. Cut hole in quilt and add clockworks.
I love my new clock!  It is 20" by 20" made in Spokane, WA Started on March 12th or 13th, finished on the 16th.
I like this detail photo:

Saturday, March 11, 2017

A New Kind of Sew Along

I had a fabulous idea today and I hope some of you will join me. Some of you have seen the fun TripsterShirts I have been making. I know all of you have seen the duffles. I was thinking about that last batch of fabric I used to make duffles and that it is on sale right now at Hawthorne Threads. Time to pick up that line if you like it. I was thinking about how those fabrics would be perfect for the jackets Janet Pray makes in her Craftsy class, "Sew Better, Sew Faster." The photos above show several of her students' work. I got the class for myself, and I hope some of you will sign up for it too - it's only $19.99 through Monday and includes the pattern. If we all take the class and sew jackets together, it will make for the best kind of sew along. I took Janet's moto jacket class and loved it. I am pretty excited about getting the pattern and getting started on this. I may even mix up fabrics a bit.  Let's do it! Here is my affiliate link for the class.  Order 3.5 yards of fabric, use one of the home dec sateens like the ones in the HawthorneThreads link above.

Thursday, March 2, 2017

Destination Wedding Duffles

This is the beautiful duffle order I shipped off yesterday. I love it when someone orders 5 at a time so I can show them off together. I can just see the excited bride and her bridesmaids heading out together for her destination wedding. Each of these bags is so gorgeous, I know they will all love them and no one will be jealous.  Etsy has updated the listings variations so I have listed these showing different quantities and volume pricing. Hopefully this will make it easier to order more bags because I do love putting these sets together. Here is the new listing on Etsy for ordering up to 10 of these bags at a time.

Thursday, January 5, 2017

Project Quilting Season 8

My friend, Kim Lapacek, has gotten a bit famous for her yearly competition "project quilting." Kim is an amazing quilter who has contagious free spirit. I have been one of her sponsors for the event for a few years. I always love to watch the beautiful projects as they are entered, and sometimes I participate too. There is still time to join in. No one gets eliminated. You can do as many or a few of the challenges as you want.  This first challenge for the 8th season is inspired by the number 8. I googled "8" for inspiration and saw the bagua, which is an 8 sided, 8 colored symbol with a yin/yang at the center. A long time ago, I put out an applique pattern for yin/yang and it's fun to do, so that became my project. I used the harmony pattern enlarged 140% and figured out how to make an octagon out of triangles for the background.  The binding was done by trimming the background fabric after quilting to 3/4" larger than the quilt and then folding over twice.
I posted a few process photos on instagram as I went.  There you can see how at home the finished quilt is on my wall too. The finished piece is about 12" square. Made in Spokane, WA, USA

Tuesday, December 6, 2016

My newest pattern Laundry and Cosmetic Bags

This video shows the bags. The links to purchase the pattern are here on Craftsy and on Etsy.  I put a full month into tweaking this to really make it the best it can be. From the materials themselves to the how-to put them together, this is a pattern that I am proud to say will get you professional results you will not find elsewhere. I teach a couple of brand new techniques in this pattern that you don't want to miss. I believe this pattern is going to up your bag making game.

Thursday, October 27, 2016

Plastic Auto Welt


My supplier is going to stop carrying this auto welt. I am not sure how long I will be able to continue to supply it. I wanted to let you know in case you planned to make some cinch packs. I expanded the color choices to try to make up for the lack of quantity. Order here.  Happy sewing!

Sunday, October 16, 2016

Preview of the Zip Around Gym Duffle


You can get the pattern here on Craftsy
and here on Etsy
I love my bag. If you are going to quilt market in Houston, you will see the black one in the Wesminster booth - it's Kaffe Fasset fabrics.
I think you will love making these too. I hope you make a bunch of them.

Thursday, August 11, 2016

New Pattern Zip Around Duffle and Adjustable Strap Video

NOTE: When you purchase this pattern, you get links to the videos. You have to copy paste those links to a browser page - enter the link on the URL line. If you try to enter the link when you are already in YouTube, it doesn't work. I do not know why they made it that way. The links work, you have to paste them directly to the URL space - that is the place on the computer screen that tells you where you are online.
The zip around duffle pattern has been brewing in the back of my mind for a few years. It came together beautifully, and I am so glad I took the time to write it the way I did. There are 16 little videos that accompany this pattern. You have seen a few of them if you watch my facebook page. Look inside the bag. Here are the inside pockets you have been wanting.
As you can see, it opens up completely with a zip around. The pattern begins with a video tour of the bag that walks you through the steps we take to make it. That is something I want to do for all of my patterns moving forward. I think sometimes reading a whole pattern before you begin can be overwhelming, but a video walk thru is more approachable.
Here is the video for the padded, adjustable strap to use with this bag (or any bag)


The attachment for the strap is very important and can be problematic for those of us sewing on home sewing machines and wanting our bags to be durable. In this pattern, I have developed an attachment method that distributes the weight of the bag, allowing you to use the long strap without any noticeable pull on the fabric.
As you can see, it is a big bag. Customers frequently ask me for even bigger bags, but this is the max I think it is reasonable to carry. I am amazed that airlines allow this size as a carry-on. It is 20 inches wide by 14 inches tall by 9 inches deep. I am using a smaller version as my yoga bag at the moment and I love it. I will be putting that one out too.

Saturday, June 11, 2016

3 QuickTips for perfectly white backgrounds


1. The backdrop:  My favorite material for white backdrops is white marine vinyl. It is heavy, durable, washable, and as you can see, it photographs well. I have about 4 yards of white marine vinyl from JoAnn's. I can hang it or lay it out as needed.
2.  The lighting: The best lighting is outside on an overcast day. Sometimes you need to recreate that. On blustery days, I have been able to set up in the sun and wait for intermittent cloud cover. Shooting in full sun is no good because the shadows are too harsh. Sometimes I have to settle for the shade. Having a truly white backdrop comes in handy when you have to use shade or even indoor lighting - see the next tip.


3. Post production: GIMP is a free program that works a lot like photoshop. In GIMP, click on color, then levels. In levels, I choose the white dropper which is on the right, then click a spot on the white background to tell it what is white. (Shooting in the shade, the white area may photograph grey. Shooting inside, white may appear yellowish.) This will smooth out the white background and make it pop. You can play with clicking different spots on the photo to get it how you want it.

I never thought to photograph animals this way. Strawberry wandered into the weed photoshoot. I will set up again and get some more shots of cats on white.  Everything looks so fresh on a white background.

Sunday, April 10, 2016

Yoga Journey 1,000 hours in a hot room

Here is what I wrote after my first hot yoga class, September 6th, 2011: I cried a little bit. I think I should have let myself cry more, but I rolled over onto my back and just let myself breathe for a minute before rejoining the class. Yes, it is that hard.  Day one, my body felt like a sponge full of toxins getting wrung out. Glad to get it out. Let's see what a month does...
This is the chronical of my first week of hot yoga:
Day one - It was hard and scary. Heart pounding, hard to breathe scary.
Day two - I thought I knew what it would be like, but it was still a very new experience. Not as scary, but still very hard and heart pounding. Felt pretty drained afterward.
Day three - Fear of it is gone, but it still requires a lot of effort. I am wondering if this is for me. Wiped out and going to bed early with a headache. My appetite is greatly changed and diminished. I want more veges and more water. Less sweets and meat.
Day four - I talked to the instructor before class. I commented that I didn't have a favorite part yet. It was all like some form of torture. She said that she focuses on how strong she is and tells herself how well she is doing. I did that throughout class and I did feel strong and proud of myself for sticking with it. Still tired early in the evening. I am more aware of my skin and it feels good.
Day 5 - I asked before class about getting any kind of added energy benefit from the practice and was told that everyone is different. I will find what there is in it for myself. I went into class ready to tell myself how strong I was again. I did that a lot, but I also felt as though I was going to spontaneously combust. It was very difficult to stay with it for 90 minutes, but I did. My heart rate was not as uncomfortable and breathing was easier. I was just extremely hot.
Day 6 - Major breakthrough. I found the joy. After the initial breathing exercise and during the first series of asanas (I think that is what they are called - I don't want to say "poses" because I don't think of them like that) the instructor, Justice, said "squeeze your biceps with your ears." That cracked me up and I laughed all through the first series. I cannot even describe the feeling of laughter mixed with the physical practise of this yoga. It was like a magical combination. Instead of my sweat feeling like a gross toxic bath, it felt like a beautiful cooling shower. I felt a love and acceptance for myself. I was able to deepen some of the moves. I felt glowing and beautiful and I was hooked. I felt pleased and happy afterward and not tired like the previous 5 evenings.
Day 7 - I went into class prepared to focus on feeling strong and joyful. I was able to do more than before. Toward the end of class I felt like some new pathways opened up. Like the inside of my body was having a party. All of my cells are bubbly and sparkling inside. A new energy source is revealed inside of me.
Day 8 - For the first time, I felt that this practice - even in the heat and the demands of 90 continuous minutes - can be relaxing. My breathing was easy, my heart rate steady. I feel a kind of heat and energy inside my body now and a cool, clean sensation on my skin. I see how people want to do this every day. I feel like this is one of the best things I have ever done for myself.
I did do 30 classes, one every day in that first 30 days. Since then, I have backed off to about 4 days a week.
About a thousand hours later:
The photo above was taken after class today. I remember this being one of the asanas that I thought impossible when I looked at Bikram's Beginning Yoga book. Now it is one of my favorites. I think of my feet and ankles like a Barbie's feet, moulded and plastic, perfectly capable of holding my whole body on pointe. Now you know my trick. The room is still hot. I still sweat my brains out. But I don't get headaches from it. I recommend hot yoga, even if it scares you at first. You could come to love it like I do.

Thursday, March 24, 2016

Sweet Slipcovers Video Number 1


I love this no fuss, easy care slipcover. You need to know just a few tricks to make it. Enjoy!
For those of you who would like a diagram to go with the video, here it is. The measurements shown are what I used for mine. Yours will likely be different. Ways to make the marks shown on the diagram: chalk, temporary pens, fold and press creases into the fabric, or use pins to mark.

Monday, March 7, 2016

My Shortest Video Ever

Maybe I am getting the hang of this? How I do circle applique. Let me know if you have questions. So the perfection of this does come from making a perfect circle out of the interfacing to begin. If you have access to a die cutter, use it to cut your interfacing. The fabric does not have to be perfect. Peltex is the stiffest and will give you a bit of texture too. You can also use batting or any interfacing you like. No die cutter? No problem, just draw and cut the best circle you can.

Wednesday, January 27, 2016

Better Sewing in 2016 Part 2

Sew clothing for yourself. Not only is this a great way to improve your sewing, it will hone other valuable skills.

Sewing has given me a deeper appreciation for what works for me. If I am spending the time to make something it better look great. There is a gal I found on Facebook who does workshops that really help to find your own personal style. I just did the free version of dressing your truth and discovered a lot about myself and why I feel better in certain fabrics, colors and patterns. I recommend you get very clear about your own style before spending money on fabric and patterns.
Once you know what to make, there is lots of help to be had at my favorite educational website, Craftsy, where I am an affiliate.  For the moto jacket I am wearing above, you need this class. It comes with the pattern. Janet Pray walks you though making a gorgeous lined jacket. I felt like I was in an in person class one-on-one with her. I am going to do her jeans jacket class too. She makes the cutest jackets! There are classes for just about everything you can think to sew. The dress I am wearing above is a hacked version of a Vogue vintage pattern 8728. I did a very short blog post about it with a couple more photos. If you want to know the details of the pattern hack, I can share that on my pattern hackers facebook page
If you have been out of the loop for a while and you want to start sewing again with something quick and easy, check this out. Craftsy has kits. You get the fabric and the pattern. Right now the prices are amazing. You won't believe it. I love the fabric quality, and there are lots of styles to choose from. Check it out.

Monday, January 11, 2016

Better Sewing in 2016 Part 1

To get better at anything, you have to do it more, you have to practice. If one of your resolutions is to learn to sew or to improve your sewing skills this year, there are a couple of things I would recommend. First, quilting.  I am talking about cutting fabric apart and putting it back together: measuring, cutting, and sewing - you need to get good at these things if you want to make great things of any kind with your sewing machine. The skills you will improve by piecing quilts are accurate measuring, accurate cutting, sewing with accurate seam allowances, pressing, and overall attention to detail.  After the quilt top is pieced, you get to quilt it. The skills you will gain by quilting the quilt yourself are the ability to handle layers of fabrics and batting, planning, and patience. Please feel free to chime in if you feel I have left out one of the skills you have gained through quilting. I cannot recommend quilting highly enough as a way to get back into sewing if you have been out of it. I even asked the affiliate folks at Craftsy to create a link for me to promote their quilting kits. There are some amazing deals to get you back in the swing of things without having to go to the fabric store. I am talking under $30 to make a quilt! Check them out. http://www.craftsy.com/ext/CherieKillilea_quiltkits And if you have fabrics already but need a class to help you improve those skills, here is a great one to get you going:
Easy Piecing - Amazing Design. I have a pieced quilt top that I haven't quilted yet, so I will be pouring over the many machine quilting classes to inspire me for that project. Here is one I am excited about, featuring 5 of the top quilting instructors in the country: Top Techniques for Big Quilts.
Keep in touch. I would love to see a picture of you, happily lounging on a quilt you made.

Tuesday, December 22, 2015

Fabric tassels

A couple of people have asked me about fraying on the fabric tassels, so I thought it would be good to show you here.  I have used my tassel daily, attached to my car key - shoving it in my pocket and hiking probably about 100 miles over the Summer and Fall with it. It gets fuzzy and curly but does not fray. I need to wash it now and see what happens, or I might need to move on the a new one. This is what it looks like now. They are fun to make. Maybe some last minute gifts to whip up with scraps? Here is the pattern: http://www.craftsy.com/pattern/sewing/other/fabric-tassels-how-to/147594